So You Wanna Be The Guy In Super Meat Boy?

What happens when you combine two of the hardest games ever? You end up with a bonus world in Super Meat Boy in which you are the ill-fated protagonist from I Wanna Be the Guy. Unlocking The Kid is no easy feat. It takes a considerable amount of time just to get used to his double jump, and after that you’ve got three grueling levels to beat. I spent two and a half hours of my life grinding my way down the spiked walls of The Guy warp zone, and I’m here to help so it doesn’t take as much of your life away.

Where Is It?
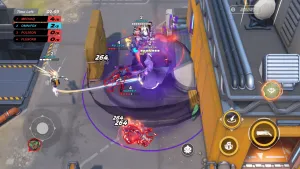
The Kid’s warp zone can be found in the seventh level of Rapture. If you jump to the far right of the map and descend the rightmost building’s wall quickly enough, you’ll find the glowing purple void near the bottom of the screen. Enter, and it shall change you forever.
Here's a quick video of what you can expect after reading this guide:

Stage 1
Now you get to play as The Kid. He has handy double jump, but he doesn’t feel quite as nimble as Meat Boy. You’re going to die getting used to him. A lot. This first level is all about expertly timed wall jumps, so don’t attempt this if you’re not completely comfortably with them yet. Also, keep your finger off the run button for all but one jump.
The Breakdown:
1. Fight your instinct to jump here, just perform a controlled freefall through the narrow spike drop. This way you’re less likely to overcompensate during your descent. Also, you end up saving both your jumps for the next tricky spot.
2. Skip the safe spot on the wall and go straight up to the left of the next chute. When you wall jump to the opposing wall, you may want to jump again to line up your zig-zag trajectory. Keep in mind that you’ll slide upwards a bit when you land on the next wall, so don’t get nicked by the spikes.
3. Don’t double jump here to line up your freefall; you need it at the bottom of the drop. The same rule as step one applies: don’t overcompensate your freefall. Imagine you’re playing a racing game as you plummet. You can navigate this fall with one slight adjustment. Trust the gravity of The Kid.
4. After adjusting for the zig-zag jumps in this slightly skinnier corridor, get ready for very tough timing. You really have to get used to the feeling of The Kid sliding up the wall in order to navigate this. Also, be careful not to slide too far up and jump too late. Practice makes perfect, and mastering the minute wall slide is clutch.
5. Make sure to jump far enough to pass the small spikes on the side, then jump right onto the clear wall. I like to hover on this wall by sliding and jumping, letting my mind rest a moment as I prepare for a tough double jump. Make sure you hold the run button for better distance, but don’t nail your head on the nasty overhead spikes.
6. There is no real science to this jump. Expect to die a ton. Nine times out of 10, you’ll die on the horizontal spikes because you didn’t jump far enough to the right. My recommendation is to practically graze the rightmost spikes and fall to safety.
7. Same as before; this is just careful timing. You’ll likely do this a few times. But by that point you’ll have the rest of the level down pat. Most of the time I jumped too late, dying in the spikes. Considering there are no ceiling spikes, I recommend jumping sooner than later. The remainder shouldn’t give you too much trouble, just don’t hold down jump for too long during the last leap towards Bandage Girl, because those overhead spikes are a killer.
Stage 2
Four elevators and whole bunch of spikes separate you from Bandage girl. Pixel perfect timing is necessary here. Don’t get discouraged though, I had a moderately easier time on this level compared to the last, but expect to die in the same two or three spots a ton. Remember: walk, don’t run, except for the long double jump in the middle.
1. The trick with this first descending lift is to stand as close to the center as possible while taking a couple small steps to avoid the spikes. I found just tapping twice on the analog stick in the opposite direction of the oncoming spikes works perfectly. Don’t be in so much of a rush that you accidentally kill yourself, but make sure your steps are quick when you take them.
2. This is where things start to get really sticky. Remembering to keep off the run button, press flush against the right wall, then just as you pass the first set of spikes, walk quickly towards the left wall, jamming on the analog stick quickly. You want to “bounce” against the walls all the way up. While finding a rhythm with the analog stick is important, remember to keep an eye on the spikes as you rise. You’re going to die here quite a bit.
3. Before the elevator rises above the ledge, jump over the twin spikes to safety. Now you must gather your courage for a demanding jump. Time your double jump so the bottom of your first jump’s arc puts you under the twin overhead spikes, allowing the two overhead spikes to pass harmlessly. This middle corridor didn’t give me much trouble, but I can see it being a pain for some.
4. This is the section that held me up the most. While it’s simply the inverse of the previous elevator section, getting your mind to work oppositely is tough. You may be tempted to hug the left wall in order to pass the first spikes, but don’t -- those first hazards are important for establishing your timing for the rest of the descent. Follow the same principles as in step two, but bring your patience.
5. I was able to nail this in the first try while adhering to the quick step strategy in step one. Just don’t get too excited by the prospect of finally rescuing Bandage Girl, causing you to accidentally blow it.

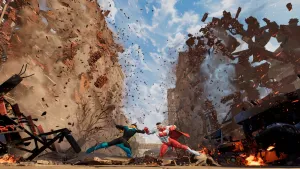
Stage 3
This stage consists of tall spike walls that rush at you at the speed of a freight train. Perfectly timed double jumps are the only way to survive here, so spending a good chunk of time studying the spike walls’ speed and consistency is necessary before attempting a full run. This breakdown of the level shows multiple spike walls firing down single corridors, but only one shoots at once. I superimposed extras in there to illustrate how many I jumped over in the process.
1. After spending time getting used to this level’s rhythm, I recommend making slow progress towards the right. Jumping over four spike wells usually got me close enough to wall without getting nailed by a fifth. The timing window to jump onto the wall is narrow, so be patient.
2. Don’t rush here; take your time jumping against the wall to time your jump into the second corridor. The trick is to jump about the same time as the spike wall fires out. You want to jump clear past the twin spikes on the ground and get in position for step three.
3. Here you’re going to want to get ready to jump almost as soon as you land, while making sure to move left in the process to make clearing the spike wall easier. After that, jump over the two spike hazards to the next clearing. By the time I landed here I needed to jump immediately, using the timing of the double jump to clear the spike wall. After that, book it over to the leftmost wall.
4. Wait until the spike wall passes and jump up into the very upper-left corner of the screen. You’re going to want to leap over the spike wall and across the bed of spikes in one motion.
5. You’ll quickly want to double jump over the next wall and land just beyond the spike bed. With some repetition, expert timing, and good luck, you’ll be able to perform this skillful maneuver twice in a row and save Bandage Girl. After that feel free to shout and the top of your lungs, fist pump the air, and spike one of your empty energy drink cans into the ground in celebration.
Congratulations on unlocking The Kid, and an even heartier pat on the back for beating some of the hardest platforming out there.
Products In This Article