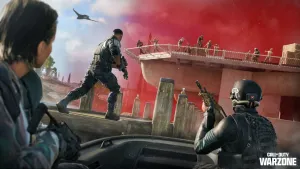
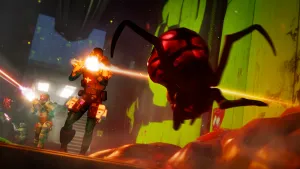
10 Tips For Dying (Slightly) Less In Helldivers

Helldivers is a demanding twin-stick shooter that pits you against endless hostile aliens. The bottom line? You're going to die a lot. However, we've compiled a list of helpful tips that should give you a brief respite from your next inevitable death.
Tip #1: Hold Your
Fire!
Look, I get it – in most twin-stick shooters there's rarely
a reason to take your finger off the trigger. Not so in Helldivers. Not only is
your ammo limited, but friendly fire is a constant threat that can't be turned
off. Do your squadmates a favor and line up your shots with care, and only fire
in short bursts to maintain accuracy. You're going to have a hard enough time
surviving the unending onslaught of enemies barreling down at you; you shouldn't
have to worry about the buddy standing behind you too.
Tip #2: Find The
Right Difficulty
This one is less about keeping you alive and more about
having fun. The first thing you'll want to do is home in on the right
difficulty for you and your crew, but that entails more than just the number
located next to the planet. Enemy type and terrain also have an effect on the
difficulty. Bugs are generally the easiest race, followed by Cyborgs and then
the Illuminate. On the planetary side of things, desert levels are easier than lake-ridden
jungle levels, while snow levels present the biggest challenge. Mission
objectives may also affect how difficult a planet is, so check out all of the
missions before pursuing a planetary reward. Keep tackling higher-level planets
until you find the sweet spot; you'll know you're there when you're
consistently battling through an entire level, but still managing to beat most
of the objectives.

Tip #3: Choose A Good
Drop Zone
One unique feature in Helldivers is the ability to select a
precise drop zone anywhere on the level before the mission begins. Take this
opportunity to study the map and coordinate the most efficient route with your
squad. That way everyone will know the order in which you'll be tackling the
objectives, and you can move quickly from one location to the next. If you land
close enough to a capture objective, you'll actually start securing the point
before you exit your pod, giving you a helpful head-start. However, since
enemies tend to congregate around objectives, most of the time you're better
off dropping into a more secluded area to give your crew time to arm up.
Tip #4: Watch Out!
Ambushing enemies and friendly fire aren't the only threats
you have to worry about. Helldivers' vast array of helpful strategems are
called down from orbit, and you don't want to be standing under one when they
land. Warn your friends when you're calling in armaments or reinforcements, and
remember that they don't land exactly on the spot you designate. Water and snow
severely limit your movement speed, so don't hang out too close to the landing
zone. Also, keep in mind that the dropship will also smoosh you faster than any
stampeding bug will – give it a wide berth as it comes in for extraction.
Tip #5: Bring The
Right Tools
You'll unlock a bunch of stratagems as you progress through
Helldivers, and although you'll land on a few favorites (see the next tip), you
should change things up depending on the mission. A good squad will coordinate
their stratagems before diving into the fray. Is one of your objectives hidden
on the map? Make sure someone is packing a helpful UAV. If you've got a lot of
ground to cover, have another friend pick the APC. Anti-personnel mines and
distractor beacons are great defensive options for getting enemies off your
back during escort missions. The higher the difficulty level, the more
important this kind of team coordination becomes.
Coming Up Next: What weapons and items to upgrade, the most valuable stratagem in the game, and a few more tips to keep you alive...

Tip #6: A Few Of My
Favorite Things
What kind of equipment you choose will ultimately depend on
your playstyle, but here are some personal favorites that I would recommend
upgrading sooner rather than later. The LAS-5 'Scythe' is an awesome laser that
doesn't require any ammo as long as you don't let it overheat, and it has
excellent accuracy and range. I'd also recommend maxing out the RL-112
Recoilless Rifle; this rocket launcher comes with a decent ammo cache and can one-shot
most armored enemies, which is a godsend when a high-level foe threatens to
wipe out your entire crew. The Minigun Turret and Reinforce stratagems are also
good abilities to upgrade as soon as possible. In terms of perks, I almost
always go with the Autoinjector, which speeds up how quickly your health
replenishes and makes it easier to get yourself up from an incap – a literal
lifesaver when you're playing with inaccurate friends (I'm looking at you, Ben
Reeves).
Tip #7: All Hail The
Mech
I could've included this one with my previous
recommendations, but it's awesome enough to warrant its own tip. Seriously,
unlock and upgrade the EXO-44 as soon as possible. No matter what the mission
is, having a massive, well-armored mech that sports both a minigun and rocket
launcher never hurts. Not only can it make your wait for extraction a cakewalk,
but the surprisingly swift robosuit isn't slowed down by water or snow. Don't
forget that you can equip a stratagem multiple times as well, meaning you could
theoretically go into battle with one mech for every one of your squadmates (or
four for yourself, if you're greedy).

Tip #8: Check The Map
Sure, you'll constantly be pulling up the map to see where
your next objective is, but you should also be using its sensory ping to
anticipate where your enemies are coming from. Roaming foes will spot you as
soon as they appear on screen, and you only have a second before they raise an
alarm and call in reinforcements – if you're not already aiming in their
direction, you probably won't dispatch them in time. Designate a member of your
squad to check the map and call out enemy locations as you move. Don't be
afraid to take the long route to an objective if it's void of enemies – you'll ultimately
save time and ammo by not having to fend off waves of angry extraterrestrials.
Tip #9: Hit The Deck!
Lots of players overlook the prone ability because it causes
you to move at a snail's pace and prevents you from shooting. Don't make the
same mistake. Not only will dropping to the ground save you from the fire of
your automated turrets and errant allies (seriously, Ben, stop selecting the
shotgun), but going prone will also make you impervious to the ranged attacks
of some enemies. Jumping at the apex of a hellbomb not only looks super
awesome, but it can save your life depending on how far you are from the
explosion.
Tip #10: Use The
Terrain To Your Advantage
Being chased by a trail of enemies can make it difficult to
call down reinforcements. Use the cover (and Helldivers' questionable
pathfinding) to your advantage by ducking around any trees, rocks, and other
environmental objects you can find. Oftentimes breaking a straight path between
you and your enemy can give you that extra second you need to key in a respawn,
and slow enemies like the bugs' lumbering tank can be even cheesed by circling
a small object. It might not be the most honorable way to wind down the time to
extraction, but at least you'll live.
For more on Helldivers, read our review and check out recent Test Chamber. Got any more tips for your fellow helldivers? Share them in the comments below!